

Soldering is a fundamental skill in electronics, metalwork, plumbing, and various DIY projects. Whether you’re repairing a circuit board or joining metal pipes, understanding the soldering process is essential. In this article, we’ll explore what soldering is, the tools you need, how to solder properly, and tips to achieve strong, clean joints. If you’re new to soldering or looking to refine your technique, this guide is for you.
What is Soldering?
Soldering is the process of joining two or more metal components by melting and flowing a filler metal, known as solder, into the joint. Unlike welding, soldering does not involve melting the base materials. Instead, the solder, which has a lower melting point, creates a strong bond between the parts once it cools and solidifies.
Soldering is commonly used in electronics to connect components to printed circuit boards (PCBs), in plumbing to seal copper pipes, and in metalwork for making jewelry and stained glass.
Types of Soldering
There are three main types of soldering, each suited for different applications:
- Soft Soldering
Used in electronics, soft soldering involves temperatures below 400°C. It uses tin-lead or lead-free solder with flux to improve the bond and prevent oxidation. - Hard Soldering (Silver Soldering)
Typically used in metalwork and jewelry, this method uses a silver alloy solder and requires higher temperatures. - Brazing
Often confused with soldering, brazing operates at temperatures above 450°C and is used for joining tougher metals like steel.
Essential Tools for Soldering
To get started with soldering, you’ll need the following tools and materials:
- Soldering Iron: A handheld device that heats up to melt solder. Adjustable temperature soldering irons are ideal for precision work.
- Solder: A metal alloy used to create joints. For electronics, rosin-core solder is commonly used.
- Flux: A chemical cleaning agent that prevents oxidation during soldering, improving the quality of the joint.
- Soldering Stand: A heat-resistant stand to hold the hot soldering iron when not in use.
- Sponge or Brass Coil: Used to clean the soldering iron tip.
- Desoldering Pump or Wick: Tools for removing solder in case of mistakes or rework.
- Protective Gear: Safety goggles and ventilation to avoid inhaling fumes.
How to Solder: Step-by-Step Guide
- Prepare the Workspace
Work in a well-ventilated area. Set up your soldering iron stand and plug in your iron to heat it. - Clean the Components
Ensure all parts to be soldered are clean. Dirt and oxidation can prevent proper bonding. - Apply Flux (if not already in the solder)
Coat the surfaces with flux to improve the solder flow and joint quality. - Tin the Tip
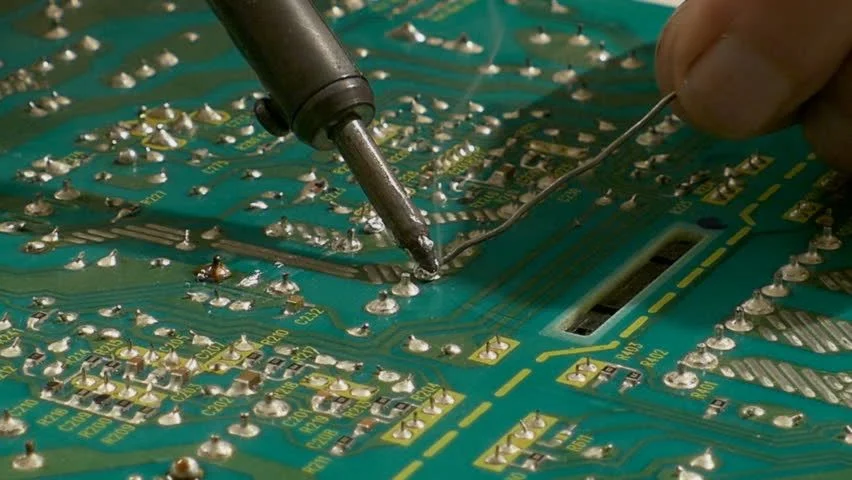
Melt a small amount of solder onto the soldering iron tip. This process, known as tinning, improves heat transfer. - Heat the Joint
Place the soldering iron tip on the joint and let it heat for a second or two. - Apply the Solder
Touch the solder to the heated joint (not the iron tip). The solder should flow smoothly and create a shiny joint. - Let it Cool
Remove the iron and allow the solder to cool naturally. Avoid moving the joint during this time to prevent cracks.
Tips for Better Soldering
- Always keep your soldering iron tip clean for better heat transfer.
- Use the right solder for your application (lead-free for eco-conscious projects, tin-lead for traditional electronics).
- Don’t overheat components—this can damage them.
- Practice on scrap components to refine your technique.
- Use a helping hand tool to hold wires or components in place.
Common Soldering Mistakes to Avoid
- Cold Joints: These occur when the solder doesn’t melt properly, resulting in weak connections. Always ensure the joint is hot enough.
- Excess Solder: Too much solder can cause shorts, especially in tight electronic circuits.
- Dirty Surfaces: Dirt or oxidation prevents solder from bonding well. Always clean before soldering.
Conclusion
Soldering is a valuable and versatile skill that’s easier to learn than you might think. With the right tools, proper technique, and a bit of practice, you can create clean, durable joints for a wide range of projects. Whether you’re a hobbyist, a student, or a professional, mastering soldering will open the door to endless possibilities in electronics, repairs, and metalwork.